Ads are chosen by Google and not necessarily endorsed by this website.
|
|||||||
|
|||||||
Tactical Rifle Painting by John McQuay You have spent the time and effort to spec out the perfect tactical rifle, or maybe you bought an off the shelf Remington LTR or 700P. Either way, you now have great rifle that you intend to deploy in a tactical environment. The problem is these type of rifles don't usually come from the factory setup to blend with your surroundings. They are usually "tactical black" or if you are really lucky and purchased a fiberglass stock, you may get a camouflage pattern molded in. In both of these circumstances it's unlikely that the weapon will actually match the terrain. You also probably have a black colored barrel, action, scope and hardware. All are likely to stick out like a sore thumb to anyone with decent eyes. Rarely do we find black in nature. So what to do? The answer is simple. Just break out the spray paint. Now relax. I know some of you just cringed. It's OK. If you take the appropriate measures you will not hurt your expensive rifle. I know it looks pretty "naked" but we aren't trying to impress the guys at the range. We are trying to conceal our position in the field, allowing us to better gather intelligence and if need be to engage selected targets. This article is mainly geared towards the Military Sniper or LE Sniper who operates in rural terrain, however Urban LE Snipers would do well to follow along. Even in cityscapes a big black rifle stands out. Most cities still have parks, bushes and trees here and there. If you don't like the colors we use, then go with some light and dark shades of gray and tan. Anything is better than black.
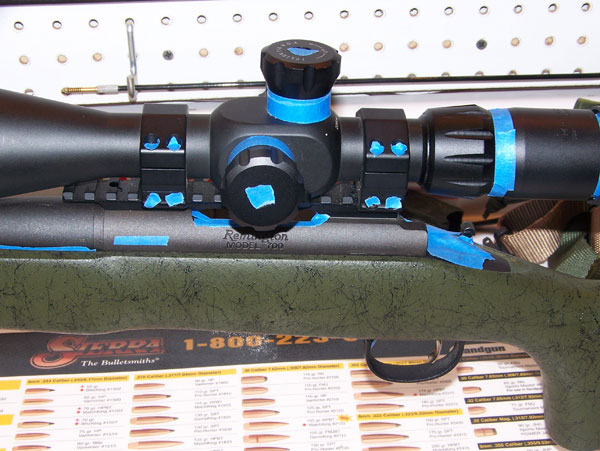
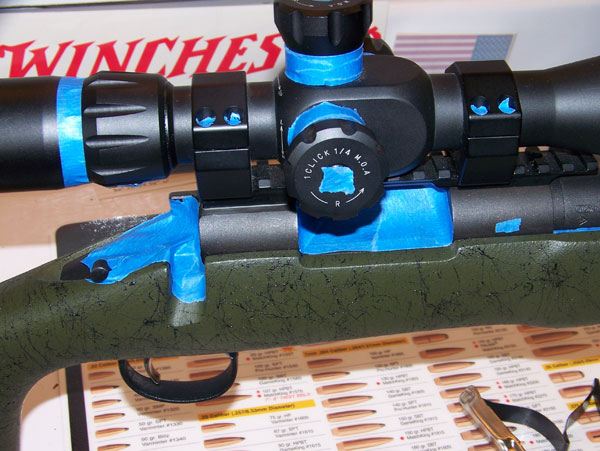
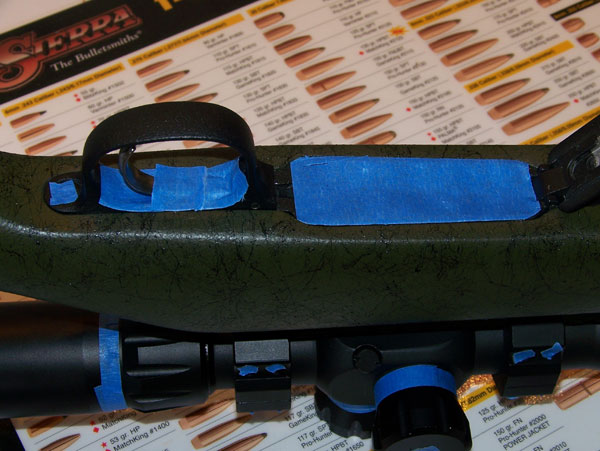
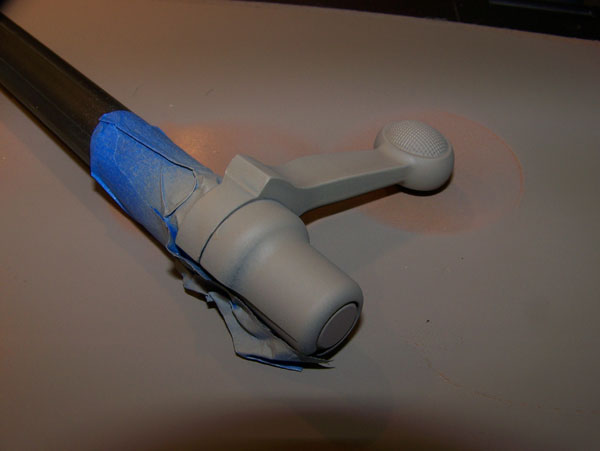
First we need to make sure the weapon is unloaded. Then wipe down the outside with alcohol, acetone or another solvent that will not leave a residue. If you use acetone, use it sparingly. Acetone can eat away many plastics and finishes. Also take care to keep the acetone away from the optics. It can damage seals. Once you have the rifle free of any oils, the fun begins. Take a moment to look the rifle over and think about anywhere that paint could cause problems. Obviously optics need to be taped off so that all of our markings will be visible later. The lenses also need to be protected from over spray. Paint can and will get everywhere. DO NOT rely on your scope caps to keep paint out. Any small screws and bolts need to be protected. Paint will build up in the heads and prevent you from getting the appropriate tool in later and can lead to stripping. The trigger mechanism needs to be completely taped up. We don't care about the trigger bow, but all access to the trigger mechanism itself must be sealed off. The following images illustrate some of the areas and methods I use. Regular blue painters tape works extremely well, comes off easy and does not leave the residue that some other masking tape does. Please take care to plug or tape the muzzle. A little paint over spray in the muzzle will likely be forcibly removed with the first shot, but every shot counts. If you got a large amount of over spray it could damage the bore. My favorite method is to place a disposable foam ear plug in the muzzle and let it expand. This creates a nice seal without having to worry about tape sticking and I don't have to pick it off later. The bolt should be removed for the duration of the process. Extra care should be taken to mask the optics. I like to remove the scope caps and stuff the objective and ocular housings with cotton balls. Then tape over the cotton balls. Lastly, reinstall the caps. The cotton balls will catch any over spray that makes it past the masking.
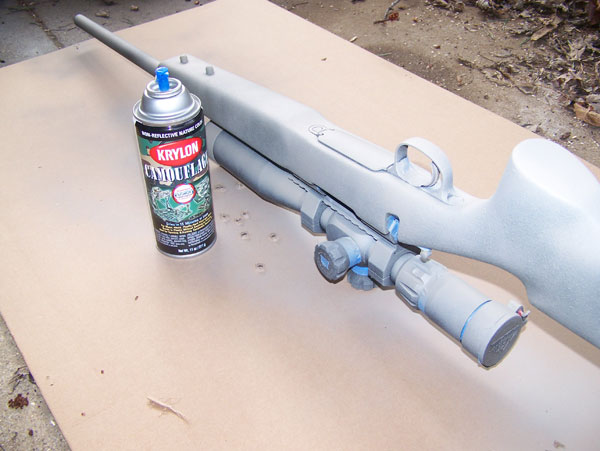
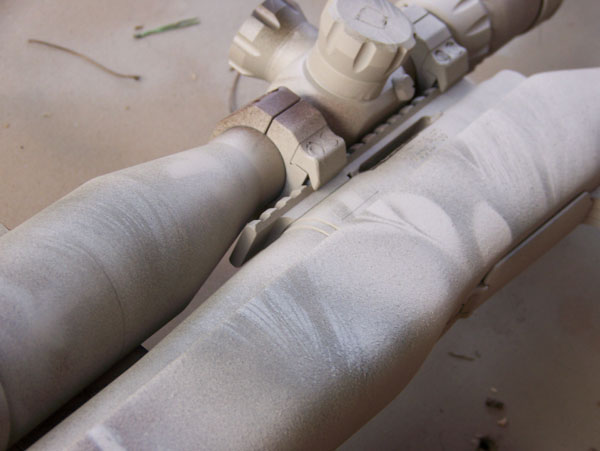
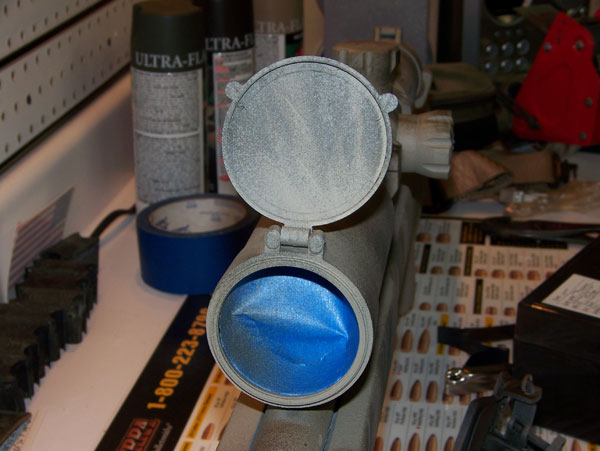
Compared to masking, the actual painting is simple. First we need to select an area that is dry, well ventilated and will be unaffected by over spray. If you do this in a garage, make sure the car isn't there. Over spray will get on everything. I do most painting on my back patio on a large piece of cardboard. This is not fancy show gun painting. We are painting a rifle that we intend to drag in the dirt, so absolute cleanliness is not needed. You should take care to make sure that there isn't so much dirt about that it will affect how the paint sticks to the weapon. A quick word on types of paint. In the past I have primarily used Bowflage to paint bolt action rifles. It was easy to use and easy to remove. There will come a time when you need to strip the rifle. I have since been told that bowflage is no longer made. I have not been able to locate it anywhere. For this time around I decided to give Krylon's Fusion Camouflage paint a try. Most paints will work as long as they are designed for wood, metal and fiberglass. Try to stay away from "gloss" paints. Flat is best. You do not need to use "camo" specific paints. Any flat spray in the color you want will work. I used the Fusion Camouflage because it was the flat color I wanted and I was curious as to how it would hold up since it appears to be intended for firearms and outdoors gear. The results were great although I have no feedback on durability yet. Ultimate durability is not a great concern since your color requirements will change with the seasons, thus requiring periodic repainting. Now that you have masked off your rifle and setup an area to spray, select your base color. I start with light and work my way to dark. It's easier to darken the rifle. It's much more difficult to lighten it up. Spray in several light coats. We do not want to load the paint on. It will cause runs and make it very hard to remove later. Heavy coats will also tend to leech into areas we don't want it. If you use Butler Creek or some other brand of "flip-up" scope caps then you need to pay attention to the inside of the Objective scope cap. When open this will appear as a huge black circle to the target. First remove the cap from the rifle and spray two light coats on the inside surface of the cover. This is best done before you start masking the rifle. This way the cap has amble time to dry and you can reinstall it to help protect the lenses while painting the rest of the rifle. I like to start by painting the bottom of the rifle. If you have large turrets you may be able to balance the rifle on the turret. If you have a quality scope, this will not harm it in any way. If it's not possible to balance the rifle in this manner then find a cardboard box that will allow the scope to fit down into it. Cut two larger "V" notches in either end of the box and allow the barrel and buttstock to rest in them with the rifle upside down. Spray light coats allowing for some dry time in between. When in doubt, follow the directions on the can. Krylon recommends thirty seconds between coats. This worked fine for us. Make sure you get the bottom of the scope and mounts. Continue until you are satisfied with the coverage. Secure the rifle so it will not fall over, then allow it to dry for the suggested time. For the Krylon Fusion 15 minutes was the recommended time. I let it go for a little longer.
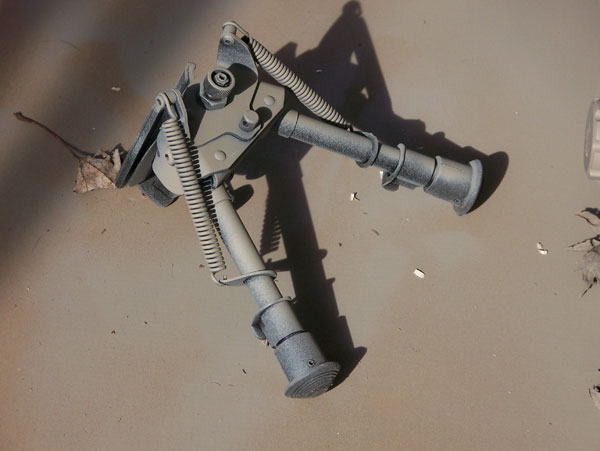
Now turn the rifle over and support it. I do not suggest installing a bipod if your rifle is usually so equipped. The pressure of the bipod will most likely damage the fresh finish. Since my stock has a flat forend I just supported it on some wood blocks. Get creative, just make sure you cover anything that will be damaged by the paint. Spray several more light coats making sure you get even coverage. Ensure that the muzzle is coated evenly. Also pay attention to the scope turrets. It's very easy to miss a spot due to their shape and location. I also take this time to spray my bipod. I don't worry too much about masking it. I just give it a light dusting or two. If you later need to disassemble it for any reason there isn't much on it that acetone will damage (other than the feet) so paint removal shouldn't be difficult.
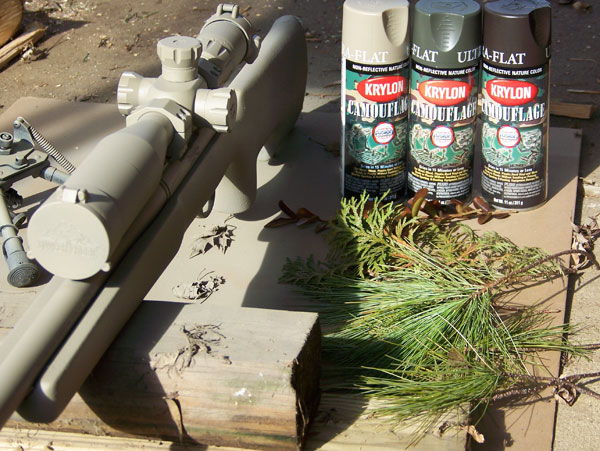
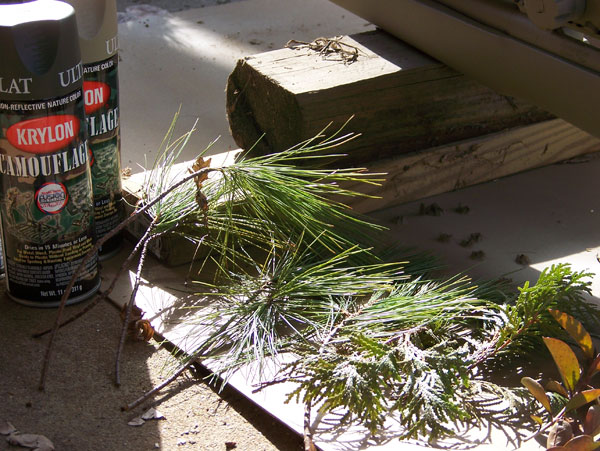
While you are waiting for the base coat to dry, go out into your AO and select some suitable vegetation to use as templates. I find that pine boughs work very well as do handfuls of long grass. Small leafy branches also work well, but may be scarce depending on the time of year. This was done in February in the midwest so leafy trees are a scarcity.
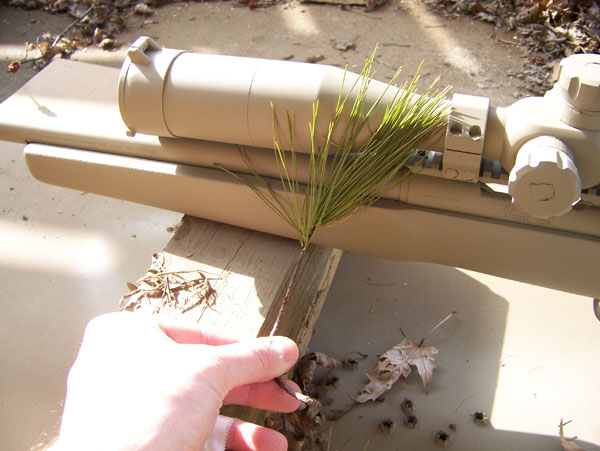
The next step is pretty simple, but takes a little finesse. Simply hold your vegetation against the rifle and mist it with one of the darker colors. This gives you a "shadow" effect. Alternately you can spray a stripe of darker color, then hold the veg. against it and mist with your light base coat. There really isn't a "right" or "wrong" way to go about it. Below you will see a combination of the techniques. Make sure you apply some to the bipod as well. All we are really worried about is breaking up the outline of the rifle and changing the colors to mimic those found in nature. Your target should never be close enough to actually see if that is a leaf or an outline on the rifle. Even high powered spotting scopes don't have the resolution required for that after a couple hundred yards. Closer than 100 yards and you will be relying on other field skills to escape detection.
I usually only give the bolt a light dusting. It's a small part and on the back of the rifle away from the target. If you train with your rifle you will wear the paint off the bolt handle. It's also a critical part that can get gummed up if you get paint down into the shroud.
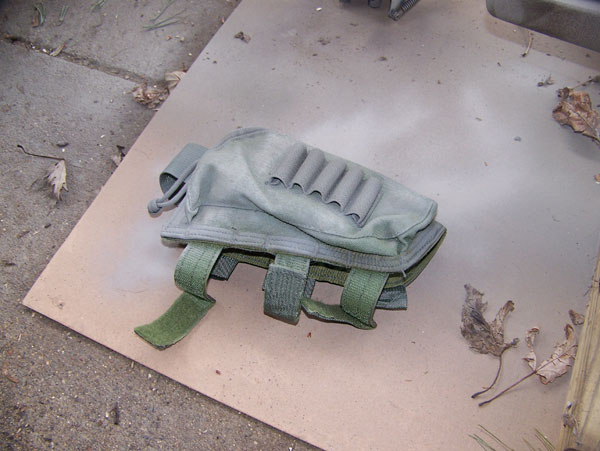
Finally, make sure you give some love to any accessories that you are using. This rifle usually wears an Eagle Stock Pack to adjust the height of the comb. It's also a handy spot to store scope tools and a few extra rounds. The big OD Green blob doesn't work well with the environment and is a bit too green for winter/early spring. While spray paint is not a good permanent solution for 1000D nylon, it will alter the outline for a few months of use. Once the paint has worn off, it's a simple matter to reapply. I use the same treatment on my drag bag. I don't know how well the "Fusion" will hold up, but I have an old pair of High Tech Magnum boots that I used for stalking that still wear the paint I put on them years ago (when black was the only color military boots came in).
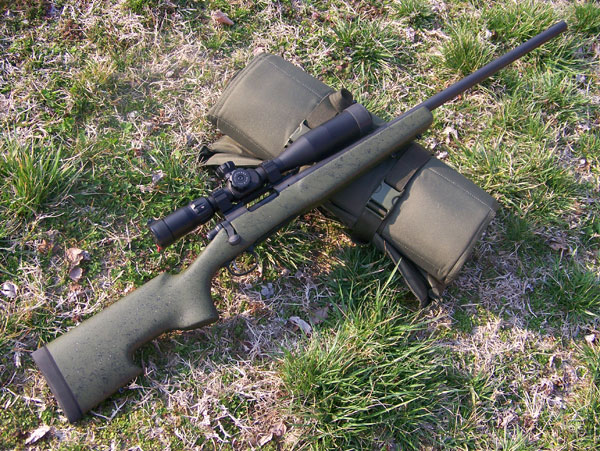
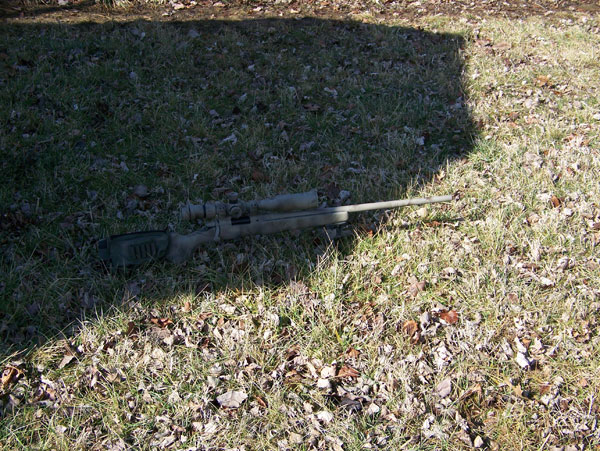
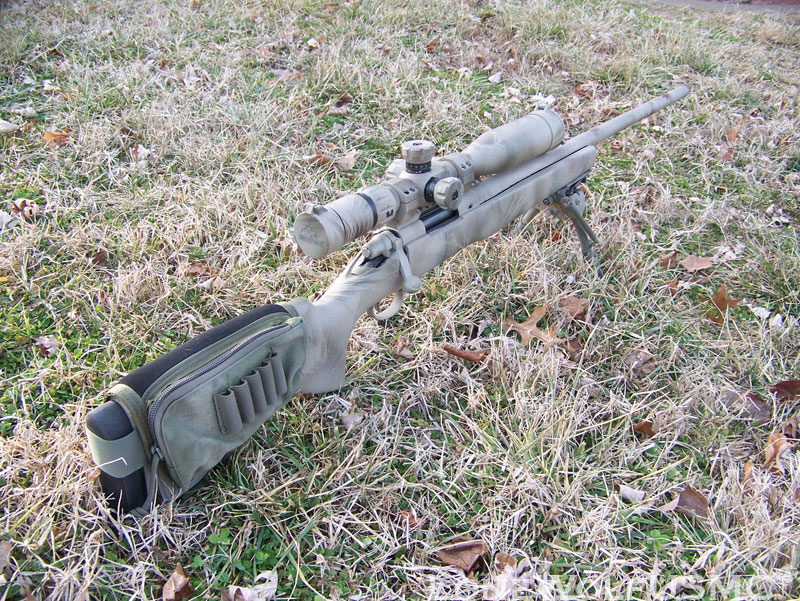
Here is a picture of the completed project to give you an idea.
The above picture shows that the paint job blends well in shade and sun at close range on a lawn. At 50-60 yards in broken terrain it would take a trained observer to detect it. |
||||||||||||||||||||||||||||
Materials Used:
A word to those who would try this. First, this is a technique intended for working rifles. It's not something that's going to impress your buddies at the range. As it wears in it will just get uglier. It's rough and while mine came out pretty well, sometimes you end up with bits of leaf or pine needles stuck to it if the paint doesn't dry fast. That's life. We aren't out to win any beauty contests. It's about making a working rifle more functional.
|